
Laying tiles in the bathroom requires precision: humidity and temperature fluctuate constantly, and the slightest errors in subfloor preparation or material selection can lead to peeling, cracks, and leaks. To ensure long-lasting results, it’s crucial to follow the correct procedure at every stage—from waterproofing to grouting.
Properly laid tiles not only protect the walls and floor but also simplify cleaning, help visually align the room’s geometry, and improve the finish’s resistance to household chemicals. Below are practical rules and tips from bathroom contractors Edmonton to help you complete the job neatly and reliably.
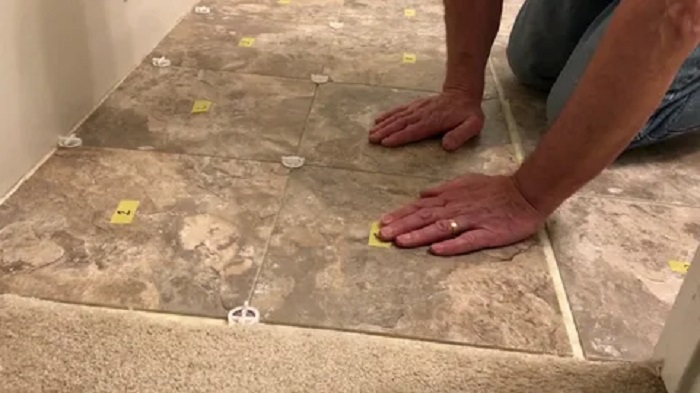
Laying Technique: Sequence and Control
Lay tiles at a stable temperature and free from drafts, observing the adhesive’s pot life. It’s important not to push the volume: quality is determined by checking the level, plane, and width of the joints.
- Dry laying: lay out several rows without adhesive, determine the cut width, and position decorative elements.
- Adhesive application: apply adhesive to the base with a notched trowel; for large format tiles, use a combined method (a thin layer on the tile and on the base) to eliminate voids.
- Laying and leveling: press the tiles down with a slight offset; check the plane with a level, use a leveler if necessary.
- Joints: maintain a uniform width; keep in mind that the minimum joint depends on the tile geometry and operating conditions.
- Cuts and holes: apply carefully, maintaining clearances from the edges; Leave a technological gap around the pipes.
- Pause for curing: Do not apply load to the coating until the adhesive has set (see manufacturer’s recommendations).
- Grouting: Apply to clean, dry seams, removing excess promptly; In corners and joints – use sanitary silicone.
Common mistakes and how to avoid them
- Poor waterproofing > leaks and mold: seal wet areas, corners, and joints with tape.
- Voids under tiles > cracks and “humming”: use the correct trowel notch size and a combined application for large format tiles.
- Ignoring expansion joints > cracking: leave expansion gaps near the walls and fill them with elastic materials.
- Incorrect grouting in corners > cracking: use silicone in joints instead of rigid grout.
Care after installation
After the grout has dried, ventilate the room and avoid Aggressive chemicals during the first few days. For porous cement grout, a sealant is useful. Regularly inspect silicone joints: if they darken or peel, replace them.
When to call in specialists: if you have uneven walls with large differences in height, a custom-made shower tray, underfloor heating with large-format tiles, or a complex layout with decorative patterns. In such cases, experienced professionals, including bathroom contractors Edmonton, often save time and reduce the risk of rework through precise preparation, proper material selection, and process control.
Assessing the Condition of Walls and Floors Before Work
Before tiling the bathroom, it’s important to objectively assess the condition of the subfloor: the walls and floor must be strong, level, and stable. Any defects (void areas, cracks, delamination, weak plaster) will eventually lead to adhesive peeling, tile movement, and damaged joints.
Checking the subfloor in advance helps determine the correct preparation: where spot repairs are sufficient and where complete layer replacement, leveling, or waterproofing is required. This directly impacts material consumption, the service life of the tiling, and the quality of the finished product.
What to check before laying
- Subfloor strength: Tap the walls and floor; dull sounds and crumbling indicate voids and weak areas that need to be removed and repaired.
- Levelliness: Apply a straightedge/level; Significant differences in level will require leveling (plaster, screed, leveling compound), otherwise the tiles will “float” and the joints will be of different widths.
- Geometry: Check the vertical alignment of the walls, corners, planes, and slopes of the floor; it is important to understand in advance where the cuts will be and how to lay the tiles.
- Humidity and signs of leaks: Dampness, mold, and salt stains require eliminating the cause (ventilation, plumbing, waterproofing) and treating the base.
- Type and compatibility of materials: Paint, whitewash, weak adhesive layers, smooth concrete, and gypsum board/gypsum fiberboard all require proper preparation (removal, sanding, priming, reinforcement, and adhesive selection).
- Cracks and deformations: Determine the nature of the cracks; “Live” and opening cracks must be repaired with reinforcement (reinforcing tapes/mesh, repair compounds), otherwise they will spread into the tiles and joints.
- Remove weak layers: knock off peeling plaster, remove paint/whitewash, remove dust.
- Repair defects: fill cracks and potholes with suitable compounds, reinforce if necessary.
- Leveling: bring the walls and floor to the required plane and slopes (especially of course, in the shower/drain area).
- Priming: Select a primer based on the substrate type and absorbency, and allow to dry.
- Waterproofing: Treat wet areas, corners, and joints, observing the application technique and drying time.
Bottom line: High-quality tiling begins not with adhesive and layout, but with diagnosing and preparing the substrate. Smooth, strong, and dry walls and floors ensure reliable adhesion, even seams, and durable finishes in conditions of constant moisture.